Quick answer (if you’re in a hurry)
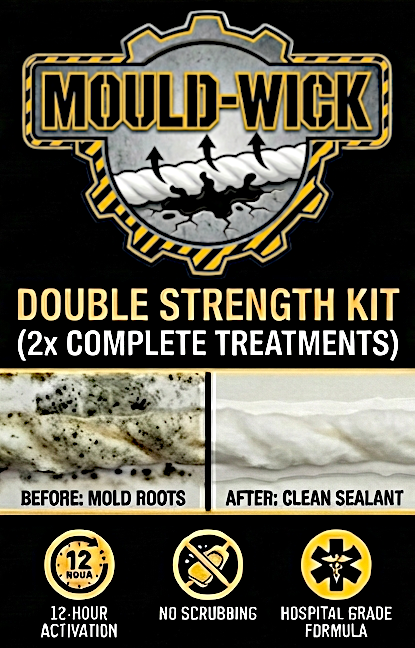
- Mould-Wick by ReactaClean to remove black mould from bathroom sealant and tile grout.
- Ventilate: open a window and run the extractor fan. Keep the door shut.
- Protect yourself: gloves + eye protection + FFP2/N95 mask.
- Wipe first: remove surface mould with warm soapy water (don’t dry-brush).
- Treat staining: use a suitable mould remover for the surface.
- Rinse + dry fully: the surface must end up completely dry.
- Fix the cause: ventilation, humidity, condensation, leaks, failing silicone/grout.
What causes bathroom mould?
Bathrooms are the perfect mould environment: warm steam, condensation on cold surfaces, and pockets of poor airflow (behind toilets, under windowsills, ceiling corners). Most “black mould in the bathroom” is a symptom of ongoing moisture rather than a one-off dirt problem.
- Condensation: hot showers + cold walls/ceilings create damp films that mould feeds on.
- Poor ventilation: weak/no extractor fan, or fan not run long enough after bathing.
- High indoor humidity: clothes drying indoors, multiple showers daily, limited window opening.
- Leaks: dripping pipes, poor seals around showers/baths, leaking tiles, damaged grout.
- Surface issues: cracked silicone, porous grout, flaking paint that traps moisture.
Before you clean: check if it’s DIY or call a pro
- Persistent Mould on bathroon and kitchen sealant
- Small patches on tiles, glass, painted walls
- Mould from condensation (steam/poor airflow)
- No signs of leaks or damp behind surfaces
- Large areas or it returns within days/weeks
- You suspect mould behind walls/ceilings
- Soft/crumbly plasterboard, swollen skirting, persistent wet patches
- Health concerns or strong musty smell throughout the home
Step-by-step: bathroom mould removal
1) Ventilate and isolate
Open the bathroom window (if you have one), run the extractor fan, and keep the bathroom door shut while you work. Keep children and pets away until you’ve finished and the area is dry.
2) Wear basic PPE
Use gloves, eye protection, and a well-fitting FFP2/N95 mask—especially if you’re cleaning a ceiling where droplets can fall.
3) Start with soapy water (don’t dry-brush)
For most bathroom surfaces, begin by wiping with warm water and washing-up liquid. This physically removes surface growth without sending spores into the air. Avoid dry scrubbing.
4) Treat remaining staining with the right product for the surface
Tip: Different areas need different approaches. The goal is “clean + dry + fix moisture”, not “use the strongest chemical everywhere”.
Best approach by bathroom area
- Tiles & shower walls: soapy wash → mould remover → rinse → dry.
- Grout: use Mould-Wick to kill black mould down to the roots. Consider re-sealing if grout stays porous.
- Silicone sealant (black spots along shower/bath edges): use Mould-Wick especially if mould has penetrated the silicone. Great for getting into difficult to clean corners. If mould has damaged the sealant it may need replacement.
- Painted ceiling: wipe gently (avoid stripping paint). If paint is flaking or repeatedly mouldy, use bathroom-grade anti-mould paint after resolving ventilation.
- Window frames & reveals: wipe daily during cold months; insulate/airflow improvements help long-term.
5) Rinse and dry completely
Rinse residues off, then dry with a clean cloth. Keep the fan running and/or window open until the area is fully dry. Mould returns fastest when surfaces stay slightly damp.
How to stop bathroom mould coming back (the prevention checklist)
- Run the extractor fan during showers and for 20–30 minutes after.
- Keep the door closed while showering (so steam goes out, not into the hallway).
- If you don’t have a fan, crack the window and wipe wet surfaces after use.
- Squeegee shower glass/tiles after each shower.
- Hang towels so they dry quickly (avoid piles).
- Fix dripping taps and slow leaks promptly.
- Aim for roughly 30–50% humidity in living areas where possible.
- Use a dehumidifier if the home stays humid, especially in winter.
- Avoid drying laundry indoors without ventilation.
- Replace mouldy silicone (it’s often the only true fix).
- Repair or re-grout cracked grout lines.
- Use bathroom anti-mould paint once the surface is dry and stable.
Common mistakes that make mould worse
- Cleaning without drying: leaving surfaces damp afterwards.
- Only treating the stain: ignoring the ventilation/humidity cause.
- Dry-brushing mould: spreads spores into the air.
- Using harsh chemicals on the wrong surface: damaging paint, grout, or sealant.
- Not replacing silicone: once mould is inside it, it often returns quickly.
Bathroom mould removal FAQs
How do I remove mould from a bathroom ceiling?
Ventilate well, wear eye protection and a mask, and wipe gently with warm soapy water. Use a suitable mould remover if staining persists, then rinse and dry thoroughly. If the ceiling paint repeatedly grows mould, improve ventilation and consider repainting with bathroom anti-mould paint once dry.
How do I remove mould from bathroom grout?
Use Mould-Wick by ReactaClean to kill black mould down to the roots. If damaged, repair/re-grout and ensure your fan removes steam effectively. Treat with Mould-Wick occasionally.
How do I remove mould from silicone sealant?
Use Mould-Wick by ReactaClean to kill mould, even where it has penetrated the silicone. If black spots return quickly, retreat with Mould-Wick and consider removing the silicone and re-seal properly after drying the area.
Is vinegar or hydrogen peroxide OK for bathroom mould?
Some people use gentler options on certain surfaces. Whatever you choose, don’t mix products, spot-test first, ventilate well, and prioritise the long-term fix: keeping surfaces dry and humidity down.
What if I’m renting?
Document mould with photos, note dates, and report issues (especially leaks, broken fans, or persistent damp) to your landlord/agent promptly. Keep receipts if you buy small items like a humidity meter or fan heater, depending on your agreement.